
[ad_1]
Okay, here’s a detailed guide on how to draw a landscape step by step, considering it’s likely based on a short-form video format (#shorts):
Phase 1: Basic Composition and Horizon Line
-
Establish the Horizon: Lightly draw a horizontal line across your paper. This is the horizon line. Its placement determines the perspective and how much sky versus land you’ll see. A lower horizon gives more sky, a higher one gives more land. Consider slightly angling it for a more dynamic feel.
-
Focal Point: Decide where the most important element of your landscape will be. This will be your focal point. It’s not a literal mark, but a visual area you’ll emphasize. Think about rule of thirds – placing it off-center often creates more visual interest.
- Foreground, Middle Ground, Background: Mentally divide your scene into these three layers. The foreground is closest to the viewer, the middle ground is in between, and the background is the farthest away. Consider sketching light guidelines for their relative sizes.
Phase 2: Blocking in Major Shapes
-
Mountains/Hills: Using light, loose lines, sketch the outlines of any mountains or hills. Vary the heights and shapes to avoid a monotonous look. Overlapping hills add depth.
-
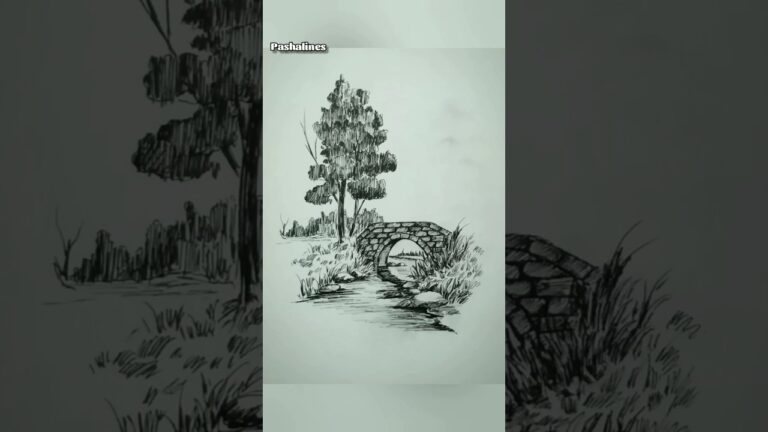
Trees: Start with the largest trees. Use simplified shapes for their canopies (ovals, triangles, cloud-like forms). Indicate the general direction of the branches with simple lines. Don’t try to draw every leaf yet. Pay attention to tree size, those further away must appear smaller.
-
Water (If Applicable): If you’re including a lake, river, or ocean, sketch its shape. Remember perspective: the closer the water is to you, the wider it will appear. The water line converges towards the horizon.
- Buildings/Rocks/Other Elements: Block in any other major elements like buildings, rocks, or fences. Again, use simple shapes and avoid detail at this stage. Ensure the scale of these objects is appropriate for the landscape.
Phase 3: Adding Details and Texture
-
Tree Detail: Start adding texture to the trees. Use different types of lines to suggest leaves and branches. Use short, broken lines for foliage. Consider the direction of light and shadow. Darker on the shadowed areas, lighter on the sunlit sides.
-
Mountain/Hill Texture: Add texture to the mountains/hills using hatching, cross-hatching, or stippling. Indicate rock formations and shadows. Pay attention to the direction of the light source. Lightly indicate the slope of the mountains or hills by varying the density of the texture.
-
Water Detail: If you have water, add reflections. The reflections should mimic the shapes of the objects above but be slightly distorted. Use horizontal lines to suggest the water’s surface. Consider adding ripples.
-
Foreground Detail: Add more detail to the foreground elements. This is where you can include things like blades of grass, small rocks, or flowers. Increasing detail in the foreground helps enhance the depth of the landscape.
- Clouds: Lightly sketch in some clouds. Vary their shapes and sizes. Use shading to create a sense of depth and volume. Remember that clouds also have shadows.
Phase 4: Shading and Light
-
Establish the Light Source: Determine the direction of the light source (sun, moon). This will dictate where the shadows fall.
-
Apply Basic Shading: Start adding basic shading to all elements of the landscape. Use lighter shading for areas that are directly lit and darker shading for areas that are in shadow.
-
Increase Contrast: Gradually increase the contrast between light and shadow. This will create a more dramatic and realistic look. Focus on the focal point of your landscape.
- Atmospheric Perspective: Use lighter shading and less detail for objects that are farther away in the background. This technique, known as atmospheric perspective, creates a sense of depth. The further things are away, the more they fade and lose contrast.
Phase 5: Refinement and Final Touches
-
Review and Adjust: Step back and review your drawing. Make any necessary adjustments to the composition, shading, or details.
-
Highlights: Add highlights to the areas that are most directly lit. This will make your drawing pop. Use a kneaded eraser to lift graphite for highlights.
-
Darken Shadows: Darken the darkest shadows to create more depth and contrast.
-
Clean Up: Erase any unnecessary guidelines or smudges.
- Signature: Sign your artwork.
Tips for a #shorts Style Landscape Drawing:
- Simplify: Focus on the essential elements and shapes. Avoid overly complex details.
- Exaggerate: Enhance the contrast and colors to make the drawing visually appealing in a small format.
- Speed and Flow: If demonstrating in a video, work quickly and smoothly. Show the process, not just the final result.
- Bold Lines: Use slightly thicker lines for the outlines of major elements to make them stand out in a small video format.
- Color (If Applicable): If using color, choose a limited palette and apply it quickly and efficiently.
- Dramatic Lighting: Emphasize strong light and shadow to create a dynamic image.
- Keep it Concise: Focus on a specific technique or element of landscape drawing, rather than trying to cover everything in one short video.
Materials:
- Pencil (HB, 2B, 4B, or mechanical)
- Eraser (kneaded eraser recommended)
- Drawing paper
- Blending stump (optional)
[ad_2]