[ad_1]
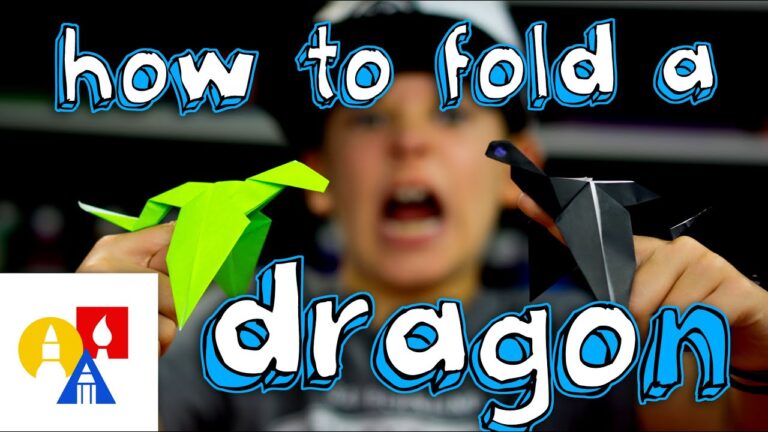
How to Fold an Origami Dragon: A Detailed Guide
This guide provides instructions for folding a relatively complex origami dragon. Be patient and precise, as it requires several folds and steps.
Materials Needed:
- One square sheet of paper (origami paper is ideal, but any thin paper will work)
- A flat, clean surface to work on
Terminology:
- Mountain Fold: Folding the paper so the crease forms a raised ridge (like a mountain).
- Valley Fold: Folding the paper so the crease forms a valley.
- Inside Reverse Fold: Folding a flap of paper inside itself, reversing the direction of the flap.
- Outside Reverse Fold: Folding a flap of paper outside itself, reversing the direction of the flap.
- Petal Fold: A combination of valley and mountain folds used to open up a section of paper.
- Squash Fold: Flattening a section of paper to create a new shape.
- Swivel Fold: Rotating a section of paper around a point.
Step-by-Step Instructions:
Phase 1: Creating the Preliminary Base
- Valley Fold – Diagonal: Fold the paper diagonally in half, creating a triangle. Crease sharply. Unfold.
- Valley Fold – Other Diagonal: Fold the paper diagonally in half along the other diagonal, creating a triangle. Crease sharply. Unfold.
- Valley Fold – Vertical: Fold the paper in half vertically, creating a rectangle. Crease sharply. Unfold.
- Valley Fold – Horizontal: Fold the paper in half horizontally, creating a rectangle. Crease sharply. Unfold.
- Squash Fold (Waterbomb Base): Using the creases you just made, bring the corners of the square together towards the center. The paper should naturally collapse into a smaller square with four flaps. This is the Waterbomb Base. Ensure all edges align neatly.
Phase 2: Shaping the Legs and Tail
- Valley Fold – Top Flaps to Center Line: Take the top layer of the top two flaps and fold the right and left edges to meet the center line. Crease sharply. Repeat on the other side. You should now have what looks like a kite shape on both sides.
- Inside Reverse Fold (Legs Preparation): On one side, unfold the right flap that you just folded in step 6. Now, using the existing crease as a guide, perform an inside reverse fold on the right flap to make a point angled downwards. Repeat on the left flap, creating another point angled downwards. These will become the dragon’s legs.
- Repeat on the Back: Repeat steps 6 and 7 on the back side of the model, creating two more points angled downwards for the other set of legs.
- Valley Fold – Tail Preparation: Take one of the remaining two flaps at the top and fold both sides of the flap into the center. This should resemble a narrow kite. This will become the tail. Repeat on the back.
Phase 3: Shaping the Head and Wings
- Outside Reverse Fold (Tail): On the flap you formed in step 9 (the tail), perform an outside reverse fold on the top of the tail flap. How far you fold it out determines the length and angle of the tail.
- Inside Reverse Fold (Neck Preparation): Take the remaining unfolded flap at the top (on either side) and perform an inside reverse fold. This will create the neck of the dragon.
- Outside Reverse Fold (Head): At the end of the neck you just created, perform an outside reverse fold to form the head. This fold will dictate the size and shape of the dragon’s head. Be careful not to fold it too sharply, as it can tear. Experiment with the angle for different head shapes.
- Petal Fold (Wings): This is a complex fold. Identify the flap which needs to be the wing. Open this flap at the base. Use the existing central crease to form a valley fold within the opened flap, and then fold the edges of the flap inward to create two new points on either side of the central valley fold. Crease sharply. The top of the flap should now be pinched into a narrow peak. Repeat on the back side for the other wing.
- Squash Fold (Wing Shaping): Flatten the wings you just created using the petal fold. This will create the broad shape of the wings. You can experiment with how you flatten them to create different wing shapes.
Phase 4: Refining the Dragon
- Valley Fold (Leg Detailing): You can refine the legs by folding the bottom tips of the legs upward slightly. This will give them a more defined shape.
- Valley Fold (Wing Detailing): Fold down the top part of the wing to emphasize the wing shape.
- Valley Fold/Mountain Fold (Body Shaping): You can further shape the dragon’s body by making subtle valley or mountain folds along the body. This is where you can truly personalize your dragon.
- Final Adjustments: Review your dragon and make any final adjustments to the legs, head, wings, and tail. You may need to gently curve the tail or adjust the angle of the head.
Tips for Success:
- Use Thin Paper: Thicker paper will be difficult to fold, especially for the inside reverse folds.
- Crease Sharply: Sharp creases are essential for a clean and well-defined model.
- Take Your Time: This is a complex model, so be patient and don’t rush.
- Don’t Be Afraid to Experiment: Feel free to adjust the angles and folds to create your own unique dragon.
- Practice Makes Perfect: If you have trouble the first time, try again. Each attempt will improve your technique.
- Use Visual Aids: Refer to photographs or video tutorials of the origami dragon for a clearer understanding of the steps. Search for "origami dragon tutorial" on websites like YouTube.
This guide provides a detailed explanation of how to fold an origami dragon. Good luck!
[ad_2]

