
[ad_1]
Makeup Application Order for Beginners: A Step-by-Step Guide
This guide provides a basic makeup application order, suitable for beginners, to achieve a natural and polished look.
I. Prepping the Skin (Essential for a Smooth Application):
-
Cleanse: Start with a gentle cleanser suited to your skin type (oily, dry, combination, sensitive). Wash your face thoroughly to remove dirt, oil, and makeup residue. Rinse well with lukewarm water and pat dry with a clean towel.
-
Tone (Optional): Apply a toner using a cotton pad to help balance your skin’s pH levels. Toners can also help remove any remaining impurities. Choose an alcohol-free toner, especially if you have dry or sensitive skin.
-
Moisturize: Hydrate your skin with a moisturizer appropriate for your skin type. Apply a thin, even layer and allow it to absorb completely before moving on to the next step (usually takes 5-10 minutes). Moisturizing creates a smooth canvas for makeup application.
-
Sunscreen (Daytime Only – Absolutely Essential): Apply a broad-spectrum sunscreen with an SPF of 30 or higher. This protects your skin from harmful UV rays. Allow it to absorb fully before applying makeup. Even on cloudy days, sunscreen is vital.
-
Primer (Optional but Recommended): Apply a primer suitable for your skin type. Primer creates a smooth base, helps makeup last longer, and can address specific concerns like enlarged pores, redness, or oiliness. Use a small amount and focus on areas where makeup tends to fade or crease. Different types of primer exist, including:
- Smoothing primers: Fill in fine lines and pores for a flawless finish.
- Mattifying primers: Control oil and shine.
- Hydrating primers: Add moisture to dry skin.
- Color-correcting primers: Neutralize redness or dullness.
II. Applying Base Makeup:
-
Color Corrector (Optional): If you have specific concerns like redness (use green corrector), dark circles (use peach or orange corrector), or dullness (use purple corrector), apply a small amount of color corrector only to the affected areas before foundation. Blend well.
-
Foundation: Choose a foundation that matches your skin tone and provides the desired coverage (light, medium, or full). Apply foundation using one of the following methods:
- Fingers: Apply small dots of foundation all over your face and blend outwards.
- Makeup sponge (e.g., Beautyblender): Dampen the sponge and bounce it across your face to blend the foundation seamlessly. This provides a natural finish.
- Foundation brush: Use a flat or rounded foundation brush to apply and blend the foundation. Start at the center of your face and blend outwards towards your hairline and jawline.
Ensure the foundation is blended evenly, paying attention to your hairline, jawline, and ears. Build up coverage gradually where needed.
-
Concealer: Apply concealer to areas that need extra coverage, such as under the eyes (to conceal dark circles), around the nose (to conceal redness), or on blemishes. Choose a concealer that is one or two shades lighter than your skin tone for under the eyes and a concealer that matches your skin tone for blemishes.
- Under Eyes: Apply concealer in an inverted triangle shape under each eye and blend gently with your finger, a makeup sponge, or a concealer brush.
- Blemishes: Dab concealer directly onto the blemish and blend the edges outwards.
-
Setting Powder (Optional but Recommended for Long-Lasting Makeup): Apply a setting powder to set your foundation and concealer in place and prevent creasing and shine. Use a large, fluffy brush to dust the powder all over your face, focusing on areas prone to oiliness (e.g., T-zone). Consider these powder options:
- Loose Powder: Typically provides a more natural finish.
- Pressed Powder: Convenient for touch-ups on the go.
- Translucent Powder: Colorless and suitable for all skin tones.
III. Adding Color and Dimension:
-
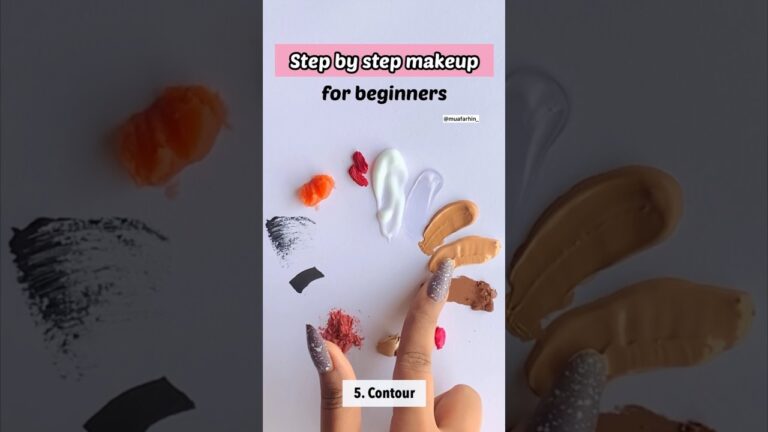
Bronzer (Optional): Apply bronzer to the areas where the sun naturally hits your face, such as your forehead, cheekbones, and jawline. Use a large, angled brush and blend well to avoid harsh lines. Choose a bronzer that is one or two shades darker than your skin tone and has a matte or slightly shimmery finish.
-
Blush: Apply blush to the apples of your cheeks. Smile to locate the apples and then blend the blush upwards towards your temples. Choose a blush color that complements your skin tone (e.g., pink, peach, coral).
- Highlighter (Optional): Apply highlighter to the high points of your face, such as your cheekbones, brow bone, inner corner of your eyes, and cupid’s bow. Use a fan brush or your finger to apply a small amount of highlighter and blend gently. Choose a highlighter that complements your skin tone and has a subtle shimmer.
IV. Eye Makeup:
-
Eyeshadow Primer (Recommended): Apply an eyeshadow primer to your eyelids to create a smooth base and prevent eyeshadow from creasing.
-
Eyeshadow: Start with a neutral base color all over your lid from lash line to brow bone. Then apply a slightly darker shade to your crease to add depth. You can add a shimmer shade to the center of your lid for extra dimension. Blend well to avoid harsh lines. Use eyeshadow brushes designed for specific purposes (e.g., blending brush, crease brush, lid brush).
-
Eyeliner (Optional): Apply eyeliner along your upper lash line and/or lower lash line. You can use a pencil eyeliner, gel eyeliner, or liquid eyeliner. Start with a thin line and gradually thicken it as desired. Winged eyeliner can also be created.
-
Mascara: Curl your eyelashes with an eyelash curler before applying mascara. Apply one or two coats of mascara to your upper and lower lashes. Wiggle the wand at the base of your lashes to coat them evenly and prevent clumping.
- Eyebrows (Optional but Recommended): Fill in your eyebrows with an eyebrow pencil, powder, or gel to define their shape and add fullness. Use short, feathery strokes to mimic natural hairs. Follow your natural brow shape.
V. Lip Makeup:
-
Lip Balm: Hydrate your lips with lip balm before applying lip makeup.
-
Lip Liner (Optional): Line your lips with a lip liner that matches your lipstick color to define their shape and prevent lipstick from bleeding.
- Lipstick or Lip Gloss: Apply your chosen lipstick or lip gloss. You can apply it directly from the tube or use a lip brush for more precise application.
VI. Setting Spray (Optional but Recommended for Long-Lasting Makeup):
- Setting Spray: Hold the setting spray about 8-10 inches away from your face and mist it evenly over your makeup. This will help your makeup last longer and prevent it from fading or smudging.
VII. Important Tips for Beginners:
- Start with Light Coverage: Don’t be afraid to start with less makeup and build up coverage as needed.
- Blend, Blend, Blend: Blending is key to a natural-looking makeup application. Use clean brushes and sponges and take your time to blend everything seamlessly.
- Use Good Quality Brushes: Investing in good quality makeup brushes can make a big difference in the application and blending of your makeup.
- Practice Makes Perfect: Don’t be discouraged if your makeup doesn’t look perfect the first time. Practice regularly to improve your skills.
- Remove Makeup Before Bed: Always remove your makeup before going to bed to prevent clogged pores and breakouts. Use a makeup remover followed by a cleanser.
- Keep Brushes Clean: Regularly clean your makeup brushes to prevent bacteria buildup and ensure a smooth application.
- Know Your Skin Type: Choosing the right products for your skin type (oily, dry, combination, sensitive) is essential for achieving a flawless look.
- Natural Lighting: Apply your makeup in natural lighting whenever possible to see the true colors of your products and avoid applying too much.
- Use Mirrors: Use good quality mirrors to see your face correctly, preferably a well-lit magnifying mirror is optional but helpful.
- Color Matching: Ensure the foundation is the right shade for your skin tone and blend onto your neck for evenness.
[ad_2]