
[ad_1]
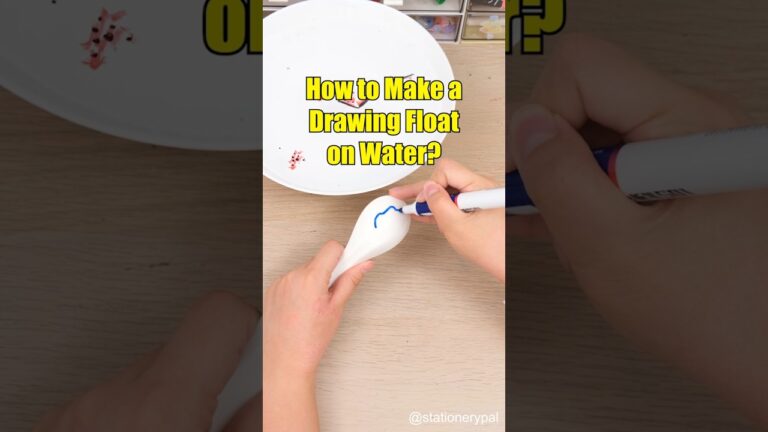
To make a drawing float on water, you’ll need the right materials and follow a specific technique. Here’s a detailed breakdown:
Materials:
-
Dry-Erase Markers: These are essential. Regular permanent markers, ballpoint pens, or paint won’t work. Specifically, you want dry-erase markers designed for whiteboards. Choose vibrant colors for a more visible effect.
-
Ceramic or Glass Dish/Plate/Bowl: A smooth, non-porous surface is crucial. Ceramic or glass is ideal because the dry-erase marker ink doesn’t bond strongly to these materials. Avoid rough or textured surfaces as the drawing will stick to them. A shallow dish works best.
-
Water: Tap water is generally fine, but distilled water might give slightly better results since it lacks minerals that could interfere. The water should be at room temperature or slightly warmer. Very cold water can hinder the ink’s release, while very hot water can dissolve the ink too quickly.
-
Clean Water Container for Transfer (Optional): A separate container filled with clean water. This is used to float your drawing on after it’s detached from the ceramic/glass surface.
-
Paper or Cardstock (Optional): If you want to transfer the floating drawing onto paper or cardstock, have a piece ready that’s slightly smaller than the water surface in your separate container.
- Spray Bottle (Optional): Filled with water. Can be used to lightly wet the drawing on the ceramic dish to aid in release (use sparingly).
Procedure:
-
Preparation: Ensure the ceramic or glass dish/plate is scrupulously clean and completely dry. Any residue, grease, or moisture will prevent the drawing from releasing properly.
-
Drawing: Use the dry-erase markers to create your drawing on the ceramic/glass surface. The thickness of the lines is important. Thicker lines tend to detach and float better than very thin, delicate lines. Create closed shapes, where possible, to make cohesive floating figures. Avoid shading, as that is just a large mass of ink that won’t hold well. Consider a simple shape, like a stick figure, a star, or a circle, for your first few attempts. When drawing, press down firmly but avoid smearing or erasing. If you make a mistake, wipe the surface clean and dry it completely before re-drawing.
-
Water Introduction: Slowly and gently pour the water into the dish, aiming for the edge to avoid disturbing the drawing. The water should just cover the drawing. If you pour too quickly, the drawing will disintegrate.
-
Releasing the Drawing: Observe the drawing closely. The water should start to seep under the ink, causing it to detach from the surface. You may need to gently tilt the dish to help the release process. Do not touch the drawing itself; you will likely smudge it. Sometimes, you may need to carefully blow on the drawing from a distance to encourage it to lift.
-
Floating: Once the drawing has detached from the dish and is floating freely on the water’s surface, it’s ready.
- Transferring (Optional): If you want to transfer the floating drawing onto paper or cardstock, slowly lower the paper or cardstock onto the surface of the water in the separate container. The drawing should adhere to the paper. Lift the paper carefully, allowing excess water to drip off. Lay the paper flat to dry. Be aware that the transferred image will likely be fragile and easily smudged.
Troubleshooting:
-
Drawing Doesn’t Float/Breaks Apart:
- The dish/plate wasn’t clean enough. Clean it thoroughly and ensure it’s completely dry.
- The dry-erase markers are old or dried out. Try new markers of a reputable brand.
- The lines are too thin or broken. Use thicker, continuous lines.
- The water was poured too quickly or forcefully. Pour gently.
- The water temperature is too cold or too hot. Room temperature is best.
- The drawing wasn’t allowed sufficient time to detach. Be patient.
- The ceramic/glass has a slight texture. Use a smoother surface.
-
Drawing Sticks to the Dish:
- Ensure the ceramic or glass is completely dry.
- Try very gently moistening the drawing with a light spray of water before introducing the main water volume.
- Drawing is Blurry/Distorted:
- The water is too agitated.
- The drawing was touched before it fully detached.
- The transfer process was rushed.
Scientific Explanation:
The floating effect works because dry-erase marker ink is designed to release easily from non-porous surfaces. The ink consists of pigments, a polymer resin binder, and a solvent. When the solvent evaporates, the binder forms a flexible film that holds the pigment together. Because the binder doesn’t strongly adhere to smooth ceramic or glass, water can seep between the ink film and the surface, causing it to detach and float. The density of the dry-erase ink film is also less than that of water, allowing it to float.
[ad_2]