
[ad_1]
How to Make Art Float on Water Using a Spoon
This process, often called "Ebru" or "paper marbling," involves creating designs on a thickened water bath, then transferring them to a surface like paper. However, the question specifically asks about using a spoon. While traditionally done with brushes and combs in a tray of thickened water, you can adapt the technique, albeit with some limitations, to create floating art using a spoon and then attempt to lift it.
Here’s how you can try to make art float on water using a spoon:
I. Materials:
-
Water: Clean, room-temperature tap water.
-
Thickening Agent: This is crucial for the paint to float. Some options include:
- Carrageenan: A seaweed extract. It’s a common choice for Ebru because it provides excellent suspension.
- Methylcellulose: Another effective thickener. It’s plant-derived and relatively inexpensive.
- Cornstarch: While less effective than carrageenan or methylcellulose, it can be used as a substitute. Results may be less predictable.
- Tempera Powder: Sometimes used in smaller scale attempts as it naturally thickens slightly in water.
-
Paint: Specialized Ebru paints are ideal. They’re designed to float and spread well. Alternatives include:
- Acrylic Inks or Fluid Acrylics: These can work but may require experimentation with thinning and additives to ensure they float. Some brands and colors float better than others. Dilute with distilled water if needed.
- Tempera Paints: Workable but tend to sink more easily than Ebru paints. Experiment with different consistencies.
-
Spoon: A small, shallow spoon (like a teaspoon) is best for controlling the paint application.
-
Shallow Container: A glass or ceramic bowl or a small tray. Its size will dictate the scale of your floating artwork. Avoid containers with oily residue. Clean thoroughly.
-
Droppers or Pipettes (Optional): For finer control of paint placement.
-
Toothpicks or Skewers (Optional): For manipulating the paint on the water surface.
-
Spray Bottle with Distilled Water (Optional): To break surface tension if needed.
-
Paper or Fabric (Optional): To try and capture the floating design. The type and thickness will affect the transfer.
-
Blowing Straw (Optional): to further manipulate paint designs on the surface of the water.
II. Preparing the Water Bath: -
Dissolve the Thickening Agent:
- Carrageenan/Methylcellulose: Follow the manufacturer’s instructions for the ratio of thickener to water. Typically, a small amount (e.g., 1-2 tablespoons per liter) is sufficient.
- Cornstarch: Mix the cornstarch with a small amount of cold water to form a slurry. This prevents clumping. Then, gradually add the slurry to the rest of the water, stirring constantly. Heat the mixture gently on the stove, stirring continuously, until it thickens. Let it cool completely before use.
- Tempera Powder: Mix with water until desired consitency is achieved.
- Let it Sit: Allow the thickened water to sit for several hours, or preferably overnight, to ensure the thickener is fully hydrated and any air bubbles dissipate. This will create a smoother surface for the paint to float on. With carrageenan, leaving overnight also helps clarify the mixture.
- Strain (Optional): If there are any clumps or undissolved particles in the thickened water, strain it through a fine-mesh sieve or cheesecloth.
III. Preparing the Paints:
- Thinning (If Necessary): If using acrylic inks or fluid acrylics, you may need to thin them with distilled water to achieve the desired consistency. The paint should be fluid enough to spread on the water surface but not so thin that it immediately sinks. Experimentation is key. Ebru paints typically don’t need thinning.
- Additives (Optional): Some artists add a drop or two of ox gall to their paints. Ox gall is a wetting agent that helps the paint spread more evenly on the water surface by reducing surface tension. However, this can affect the colors, so test it before using it in your final artwork.
- Test for Floating: Before you start creating your design, test each color to make sure it floats well on the thickened water. If a color sinks, try thinning it further or adding a small amount of wetting agent.
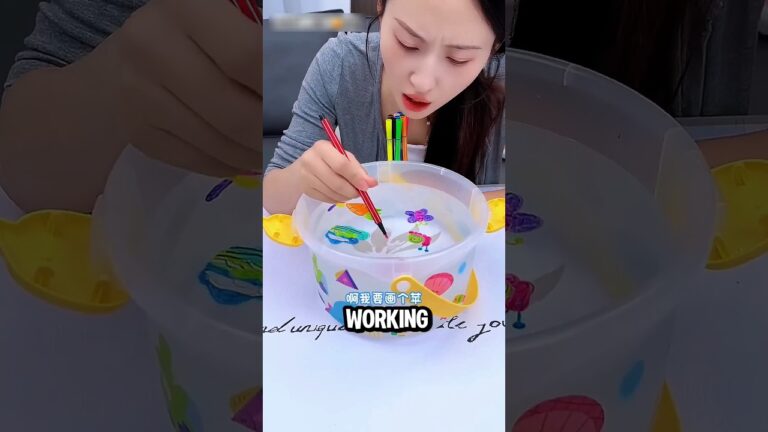
IV. Creating the Floating Design:
-
Gently Spoon the Paint: Using the spoon, carefully drip or pour small amounts of paint onto the surface of the thickened water. Hold the spoon close to the surface to minimize the force with which the paint hits the water.
-
Vary Colors and Placement: Experiment with different colors and placements to create your desired design. Start with lighter colors first, as darker colors can overpower lighter ones.
-
Manipulate the Paint (Optional): Use toothpicks, skewers, or a blowing straw to gently swirl, drag, and manipulate the paint on the water surface. This is how you create intricate patterns and designs.
- Break Surface Tension (If Needed): If the paint is not spreading well, lightly mist the surface of the water with distilled water from a spray bottle. This can help break the surface tension and allow the paint to spread more easily.
V. Attempting to Lift the Design (Optional):
-
Carefully Position the Paper/Fabric: If you want to transfer the design, gently lower a piece of paper or fabric onto the surface of the water, being careful not to trap any air bubbles underneath. Hold the paper/fabric by two opposite corners and slowly lower it from the middle outwards.
-
Let it Rest (Briefly): Allow the paper/fabric to rest on the surface for a few seconds (e.g., 5-10 seconds) to allow the paint to adhere to it.
-
Lift and Rinse: Carefully lift the paper/fabric from one corner, peeling it slowly and smoothly from the water surface. Immediately rinse the paper/fabric gently with clean water to remove any excess thickening agent.
- Dry Flat: Lay the paper/fabric flat on a clean surface to dry.
VI. Troubleshooting and Tips:
- Paint Sinking: This is the most common problem. Ensure the water is adequately thickened, and the paint is properly thinned. Test each color individually.
- Paint Not Spreading: Try misting the surface with distilled water or adding a small amount of wetting agent to the paint.
- Air Bubbles: Ensure the thickening agent is fully dissolved and the water bath has sat long enough for air bubbles to dissipate.
- Experimentation: Ebru is a very experimental art form. Don’t be afraid to try different techniques, materials, and color combinations to find what works best for you.
- Cleanliness: A clean work area and materials are essential for success.
- Spoon Size: The amount and shape of the spoon will influence the paint patterns you can create. Experiment with different sizes and shapes.
- Ambient Conditions: Temperature and humidity can impact the spread of the paints.
- Scale: The size of the spoon restricts the area of design. This method is better suited to smaller more immediate works.
Limitations of Using a Spoon:
- Control: Applying paint with a spoon will not give you the fine control possible with brushes.
- Design Complexity: Intricate patterns are more difficult to achieve with a spoon. You’ll likely create more abstract or organic shapes.
- Coverage: It will be harder to evenly distribute the paint.
- Traditional Techniques: This is a highly modified version of Ebru, and will not replicate traditional results.
This method is more of a fun and experimental approach to creating floating art. While achieving the precise, intricate designs of traditional Ebru may be challenging with just a spoon, you can still create beautiful and unique effects. Good luck!
[ad_2]