
[ad_1]
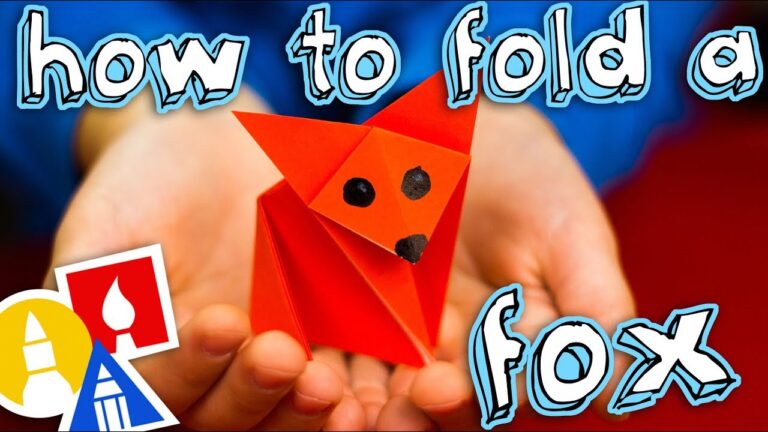
Here’s how to fold an easy origami fox:
Materials:
- One square sheet of origami paper (any color)
Instructions:
-
Start with the Color Side Up: Place your square sheet of paper with the color you want for the fox facing up.
-
Fold in Half Diagonally: Fold the paper in half diagonally, crease well, and unfold. This will create a crease from one corner to the opposite corner. This is your first valley fold.
-
Fold the Other Diagonal: Fold the paper in half again along the other diagonal, crease well, and unfold. This creates a second valley fold going from the other two corners.
-
Collapse into a Waterbomb Base: Bring all four corners of the square towards the center, allowing the creases to fold in on themselves. This will form a smaller square, known as a waterbomb base. Ensure the open points are facing down.
-
Turn to an Open Side: Rotate the waterbomb base so that one of the open points (the loose flaps) is facing towards you.
-
Fold the Top Flaps to the Center Line: Take the top layer of the right corner and fold it inwards, aligning the edge with the center vertical line. Crease well.
-
Repeat on the Left Side: Repeat the same fold on the left side, folding the top layer of the left corner to the center vertical line. Crease well. You should now have a kite shape.
-
Fold the Top Point Down: Take the top point of the kite shape and fold it down. The amount you fold down determines the length of the fox’s head. A smaller fold will result in a longer head. Crease well.
-
Inside Reverse Fold for the Head: Unfold the fold you just made in Step 8. Now, open the paper along the crease you just made and "inside reverse fold" that flap. This involves bringing the point inside the model and tucking it upwards along the crease, so that the color of the paper becomes visible. This creates the fox’s head.
-
Fold Up the Bottom Point (for the Tail): Take the bottom point of the kite shape and fold it upwards. Again, the amount you fold up determines the length of the tail. Crease well.
-
Inside Reverse Fold for the Tail: Similar to the head, unfold the fold you made in step 10. Open the paper along the crease and inside reverse fold this flap to create the tail.
-
Shape the Fox (Optional): You can gently shape the fox by curving the tail or adjusting the angle of the head to give it more personality.
- Add Eyes (Optional): Use a marker or pen to draw eyes on the fox’s head.
You now have an origami fox!
[ad_2]