[ad_1]
Scoring the perfect free kick requires a blend of technique, power, placement, and practice. Here’s a detailed breakdown:
I. Understanding the Physics & Principles
-
Bernoulli’s Principle: The key to bending the ball lies in creating a pressure difference on either side of the ball as it spins. Faster airflow on one side results in lower pressure, causing the ball to curve towards that side.
-
Magnus Effect: The phenomenon where a spinning object moving through the air experiences a force perpendicular to both the direction of motion and the axis of rotation. This is the force that bends the ball.
-
Spin Rate: The more spin imparted on the ball, the greater the Magnus force and the sharper the curve.
-
Air Resistance: The ball slows down due to air resistance. The faster the ball travels, the greater the air resistance. This needs to be factored into power and trajectory.
- Gravity: The constant downward force affects the ball’s trajectory.
II. Stance and Approach
-
Positioning Relative to the Ball: Your position dictates the type of shot.
- Directly Behind: Emphasis on power and minimal curve (e.g., knuckleball).
- Slightly to the Side (Angle): Allows for curling shots.
- Far to the Side (Severe Angle): For extreme curve or dipping shots around the wall.
-
Stance:
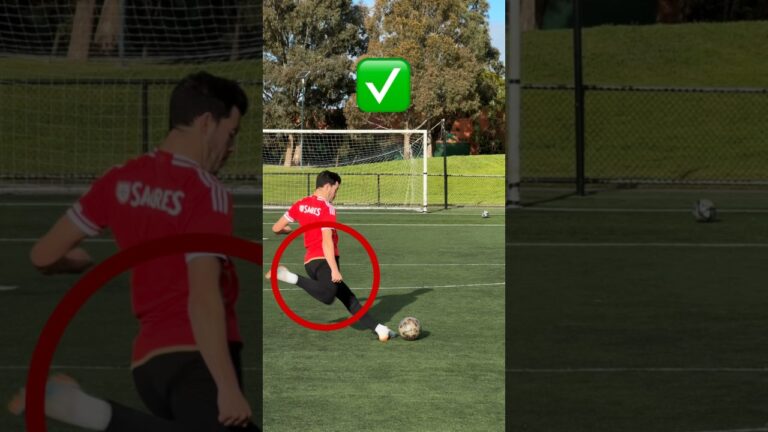
- Non-Kicking Foot Placement: Planted firmly beside the ball, pointing towards the intended target. Crucially, this foot acts as an anchor. Placement affects height; further back creates lift.
- Kicking Foot Position: Slightly behind the ball. The angle influences the contact point.
- Body Angle: Lean over the ball slightly. This helps keep the shot low.
- Approach:
- Angle: The angle of your approach dictates the curl. A straighter approach usually means more power.
- Steps: Typically 3-5 steps back and 1-2 steps to the side. The number of steps is adjusted to find optimal rhythm.
- Rhythm: A smooth, consistent run-up. Avoid rushing the shot. The last step should be slightly longer for more power transfer.
III. Contact Point & Foot Position
-
Inside of the Foot (Curling Shot): Contact the ball slightly off-center, on the outside portion of your instep (near the big toe). This imparts sidespin. The more off-center the contact, the more curve. The foot should sweep across the ball.
-
Outside of the Foot (Reverse Curve): Contact the ball with the outside of your foot (near the little toe). Sweep across the ball in the opposite direction.
-
Laces (Power/Knuckleball): Contact the ball with the laces, aiming for the center of the ball. For a knuckleball, a very precise, firm contact is needed, minimizing spin. Stiff ankle is key.
-
Angle of Foot: Slightly angled downwards for a dipping shot. Straight on for a more level trajectory.
- Follow Through: Complete the kicking motion, allowing the leg to swing naturally towards the target. This ensures full power transfer and helps maintain accuracy. For a knuckleball, a minimal follow-through is preferable to avoid imparting spin.
IV. Generating Power
-
Leg Swing: Generate power from the hips and core, not just the leg. A full, powerful swing is crucial.
-
Planting Foot: A stable planting foot is essential for transferring power from the run-up to the ball. Keep your weight over your planting foot.
-
Core Engagement: Engage your core muscles to stabilize your body and generate additional power.
- Breathing: Exhale as you strike the ball to release tension and maximize power.
V. Placement & Accuracy
-
Visualizing the Trajectory: Before the kick, visualize the path of the ball and identify your target within the goal.
-
Aiming Point: Aim for a specific spot on the goal, considering the wall’s position, the goalkeeper’s positioning, and the distance to the goal.
-
Adjusting for the Wall: Curve the ball around or over the wall. The closer the free kick, the steeper the curve usually needs to be.
- Goalkeeper Positioning: Observe the goalkeeper’s stance and anticipate their movements. Aim for the opposite side of the goal.
VI. Types of Free Kicks & Techniques
-
Curling Free Kick: Emphasis on sidespin. Contact with the inside of the foot. Good for bending the ball around the wall. Difficult to control power.
-
Power Free Kick: Emphasis on power and a flatter trajectory. Contact with the laces. Best for longer distances. Requires considerable strength.
-
Knuckleball Free Kick: Minimal spin. Contact with the laces, a stiff ankle, and minimal follow-through. The ball moves erratically in the air. Extremely difficult to master consistently.
-
Dipping Free Kick: Topspin is imparted. Contact slightly below the center of the ball. The ball will dip sharply downwards, often over the wall.
- Under the Wall Free Kick: A low driven shot designed to pass underneath a jumping defensive wall. Requires deception and precise placement.
VII. External Factors
-
Distance to Goal: Affects the type of shot, power needed, and trajectory.
-
Wall Position: Dictates the amount of curve needed and the target area.
-
Goalkeeper Position: Influences the aiming point.
-
Wind: Can significantly affect the ball’s trajectory. Adjust your aim accordingly.
-
Pitch Condition: Can affect your run-up and planting foot stability.
- Ball Type: Different balls react differently. Know the properties of the ball you’re using.
VIII. Practice and Refinement
-
Consistent Practice: Regular practice is essential to develop muscle memory and refine technique.
-
Repetition: Repeat the same free kick variations multiple times to improve consistency.
-
Varying Distances and Angles: Practice free kicks from different distances and angles to simulate game situations.
-
Record and Analyze: Record your free kicks and analyze your technique to identify areas for improvement.
-
Experiment: Try different techniques and approaches to find what works best for you.
-
Seek Feedback: Ask a coach or experienced player to provide feedback on your technique.
- Game Situations: Practice free kicks during practice games to prepare for the pressure of a real match.
[ad_2]

